Summary
– The different types of tile cutting
– Straight cut with ceramic tongs
– Straight cut with a tile cutter
– Straight cut with an electric tile cutter
– Rounded cut with a parrot cutter
– Rounded cut with a crankshaft saw
– Rounded cut with a hole saw
– Angled cut with an angle grinder
– Tips for cutting thick tiles
When laying tiles, it is often necessary to adjust the size or shape of some tiles, either to fill in the remaining edges, called rims, or to insert a light switch, electrical outlet, or pipe. It would help if you, therefore, cut some tiles.
You can make straight cuts, angled cuts, or rounded cuts.
There are several tools for cutting tiles. Each one is adapted according to the style of tile and the degree of precision of the cut.
The different types of tile cutting
You can make different tile cuts depending on the space you want to cover.
The straight cut
The straight cut is the most common, used to cut tiles to size and cover the edges (the small spaces left between a row of whole tiles and a baseboard or the corner of a wall).
– Ceramic tongs are used to make straight cuts by hand and are helpful when a small number of thin tiles need to be cut.
– The tile cutter is a practical tool for making straight cuts on tiles. It is a machine that works on the same principle as the ceramic pliers but saves time.
– The electric tile cutter can be used to make straight cuts or to cut only part of the tile. It offers the advantage of working precisely and quickly.
The round cut
The round cut allows you to adapt the shape of the tiles to allow the passage of a pipe or the installation of a switch or an outlet. To cut a large number of tiles or thick and resistant tiles, use a machine.
– The parrot clamp or the crankshaft-saw allows you to make rounded cuts by hand. They allow working thin tiles with precision.
– The hole saw, mounted on a drill, can drill holes of large diameter in the center of the tiles. It is convenient for making circular cuts.
The miter cut
The miter cut is used when laying tiles diagonally.
– You can use the ceramic tongs to make manual bevel cuts on thin tiles.
– You can use the angle grinder equipped with a diamond disc to make miter cuts on thick or resistant tiles.
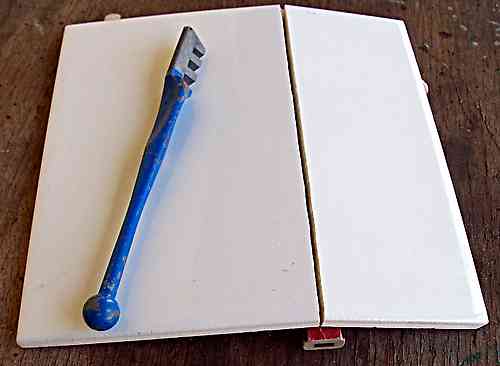
Straight cut with a ceramic cutter
To make a straight cut using a ceramic cutter:
– Mark the cut line with a felt-tip pen. Use a ruler to get a perfect result.
– With the help of a ruler, trace a groove with an etching tip along the line, passing the tip several times to weaken the tile.
– Separate the tile with the pliers: follow the cut line by tightening the pliers; the tile is cut.
Straight cut with a tile cutter
For thick tiles or to make precise cuts, use a machine.
The tile cutter allows straight cuts:
– Using a marker and a ruler, draw a line on the tile to guide the cut.
– Place the tile on the tiler, positioning it on the machine’s cutting line.
– Then, lower the lever in a smooth, even motion to separate the tile in half.
– The tile is cut.
Good to know: the tile cutter is mainly used to cut wall tiles, which are often less resistant than floor tiles, such as earthenware.
Straight cutting with an electric tile cutter
The electric tile cutter makes it easier to cut thick tiles (such as stoneware tiles) or large tiles:
– Mark the tile with a ruler and a felt-tip pen.
– Place the tile on the cutting line of the tile cutter: this is the line that the blade follows.
– Turn on the tile cutter (be careful, this device is very noisy) and slowly slide the tile along the cutting line towards the blade. Push the tile to cut it. Keep your fingers away from the blade.
– Start by cutting the tile about a third of the way through.
– Then, replace it in the other direction and finish the cut.
Caution:
- Wear safety glasses and gloves.
- Remove any bracelets, watches, or other items hanging from your wrist and roll up your sleeves.
- Keep your fingers away from the blade while cutting.
- Consider protecting your floor with a tarp or an old sheet.
Rounded cuts with parrot pliers
For round cuts, use a parrot clip:
– Delineate the cut to be made on the tile:
◦ First, outline a piece of cardboard the same size as the tile.
◦ Then cut out the template for the shape.
◦ Transfer the outline to the tile.
– Use the parrot beak pliers to “nibble” the tile a little at a time, following the contours.
– Deburr the tile to finish: sand the edges to remove burrs and smooth them out.
Rounded cut with a crankshaft saw.
You can use the crankshaft saw to make rounded cuts:
– Trace and cut a template on cardboard the same size as the tile to be cut. Transfer the outline to the tile with a felt pen.
– On a wooden board, nail two cleats (long wooden sticks): the space between the two cleats must correspond to the width of a tile. Wedge the tile between the two strips so that it does not move during cutting.
– Saw the tile along the cut line you drew.
– Sand the edges of the tile to smooth them out after the cut.
Rounded cut with a hole saw.
The hole saw is mounted on a drill and can drill large diameter holes in the tile. It is used to make perfectly circular cuts in the tile.
– Choose the diameter suitable for the cut you want to make.
– Locate the point to be drilled on your tile and mark it with a felt pen. This is the center of the circle.
– Place the tile on a board before drilling; the wooden board absorbs the vibrations of the drill.
– Cover the area to be drilled with clear tape so that the hole saw does not slip on the tile.
– Drill slowly at first and then gradually increase the speed of the drill.
Note: Do not use the percussion function of the drill.
It is more convenient to use a drill press to clamp the tile and work accurately.
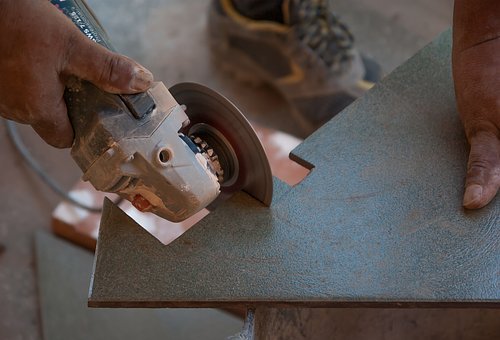
Cutting at an angle with an angle grinder
Use the angle grinder to make angled cuts:
– Draw the cut lines with a felt-tip pen and a ruler
– Equip the angle grinder with a diamond disc.
– On a wooden board, nail two cleats (long strips of wood): the space between the two cleats should correspond to the width of a tile.
– Wedge the tile between the two strips so that it does not move during cutting.
– Tilt the grinder down slightly and cut the tile, holding the grinder with both hands.
– Move back and forth to cut the tile. Follow the lines you have drawn.
– Sand the edges of the cut tile to remove any irregularities caused by the cut.
Caution: Wear safety glasses, a mask, and gloves.
Tips for cutting thick tiles
To avoid damaging thick tiles when cutting, it is best to use appropriate tools and adopt the right gestures. The most difficult tiles to cut are porcelain stoneware, stone, etc.
Note: on the other hand, earthenware or terracotta tiles, for example, are softer and therefore easier to cut.
Tools to use to cut thick tiles
Successful cutting of thick tiles requires the use of the right tools:
– the idea is to use a tungsten carbide bit on a drill;
– other options:
◦ get a manual or electric tile cutter: electric tile cutters can make cuts on tiles up to 10 mm thick;
◦ prefer a grinder disc: in this case, choose a special tile disc or one suitable for cutting building materials.
Good to know: to buy an electric tiler, count between $40 and $300 depending on the model. You can also rent one for about $15 per day.
Cutting thick tiles
Once you are well equipped, cutting your thick tiles is relatively simple if you follow these tips:
– Before cutting the tiles:
◦ make a cardboard template to the desired dimensions;
◦ position it at the tile’s future location to check its accuracy and, if necessary, to mark the changes in dimensions.
– If using a drill:
◦ remember to place a piece of adhesive between the tile and the drill bit to prevent chipping;
◦ work at a slow speed.
– If you use a manual tiler: if the cut is difficult, make a scratch on the back of the tile with a nail or a sharp tool, then pass the tiler again.
– To lay the last tile:
◦ position it on the last one you stuck against the wall;
◦ draw a reference line with a pencil;
◦ remove the thickness of the joint from this line to determine the correct cut.
Please note: remember to protect yourself with gloves and goggles when cutting.
Tools for cutting tile
| Tile cutter | About $5 |
| Pliers | $3 approx. |
| Parrot nose pliers | $4 |
| Tile cutter | Starting at $20 |
| Electric tile cutter | Starting at $40 |
| Angle grinder | Starting at $40 |
| Scribe | About $5 |
| Crankshaft saw | $30 |
| Hole saw | Starting at $30 (without the drill) |